
18 Must-Have Kitchen Utensils That Will Make Cooking a Breeze
I put this together because cooking should feel easy, not like you need a degree in gadgetry. The kitchen world lately feels crowded with shiny tools that promise miracles. I want to cut through the noise and help you cook with confidence. The right utensil can turn a messy dinner into a smooth, calm routine. Think of the feel of a sharp knife gliding through vegetables or a silicone spatula pulling every last bit of batter from a bowl.
Who is this for? If you are a busy home cook who wants to save time, a student with a small kitchen, or someone just starting out who wants to make tasty meals without the fuss, this is for you. If you care about clean up, safety, and steady results, you’ll find these ideas useful.
18 must-have kitchen utensils that cover the basics and a few smart extras. You’ll meet a sturdy kitchen knife and cutting board, tongs for flipping, a whisk for sauces, a spatula for scraping bowls, a ladle for soups, a slotted spoon, a peeler, a grater, a can opener, a bottle opener, kitchen shears, a digital thermometer, a timer, a colander for pasta, a sieve, measuring cups and spoons, and more handy tools. These fit small spaces and daily meals, so you won’t feel boxed in.
Why these tools matter is simple. Good tools save you steps. A sharp knife speeds up chopping and keeps you safe. A nonstick spatula helps you scrape every bit from a pan or bowl. A reliable timer stops overcooking. A colander drains pasta quickly without a splash. With the right set, you cook more with less mess and less stress.
How to pick them is easy. Choose durable materials like stainless steel, silicone, and wood. Look for easy cleaning and comfortable handles. Think about where you store them and how often you use them. Keep the tools you reach for near the stove and sink so cooking feels natural, not forced.
Next steps are simple. Take a quick look around your kitchen and pick up a couple of upgrades at a time. Start with a good knife, a solid cutting board, and a reliable measuring set. You’ll notice the difference in weeknight meals and weekend batches. This guide is here to help you choose gear that fits your cooking, your space, and your budget.
1. Silicone Spatula

Do you want a tool that makes cooking easier and cleanup faster? A silicone spatula can be the helper you reach for every day. It handles high heat without melting, and it won’t lose its shape or bend. It scrapes bowls clean so you don’t waste batter or sauce.
Why you will reach for it
- Heat resistant and flexible, it stirs, flips, and scrapes without melting.
-
Gentle on nonstick surfaces, so your pans stay smooth longer.
-
Colorful options add style to your kitchen and match your gear.
-
Easy to clean; you can wash by hand or in the dishwasher.
How to choose the right silicone spatula
- Pick a size that fits most bowls and pans.
-
Choose a sturdy, comfortable handle for a confident grip.
-
Check that the head is pure silicone and free of seams that trap food.
-
Look for a clear heat tolerance claim from the maker.
Practical uses you can try today
- Flip pancakes with control and ease.
-
Scrape every bit of batter from bowls without scratching the sides.
-
Fold whipped cream or light batters gently into mixtures.
-
Spread frosting or glaze smoothly over cakes and cookies.
Care and longevity
- Wash after use and dry thoroughly.
-
Store in a dry place away from sharp edges to keep the silicone intact.
1. Silicone Spatula
Editor’s Choice

5 Pieces Silicone Spatula Set, Food Grade Rubber Spatula, Upgrade Strong…

Comsmart BBQ Gloves, 1472 Degree F Heat Resistant Grilling Gloves Silico…
2. Whisk

Why you need a whisk A good whisk makes cooking easier. It helps beat eggs, blend batter, and smooth sauces. When you whisk right, you hear a light rattle and see tiny air bubbles rise. You end up with fluffy peaks or a glossy sauce in minutes. It’s simple, but it moves your kitchen forward.
Here is how to pick and use one:
- Material: Stainless steel heads are strong and last a long time. Silicone heads won’t stick to nonstick pans and are gentle on surfaces.
-
Handle: A soft, grippy handle feels comfy in your hand. Choose a shape that fits well and doesn’t tire your grip.
-
Size: A small whisk fits a jar of dressing. A larger whisk handles thick batters. It helps to have two sizes for different jobs.
Next, practical uses:
- Use it to whip eggs until they are airy and light.
-
Mix pancake or muffin batter until there are no lumps.
-
Emulsify vinaigrette by whisking oil and vinegar together.
-
Whisk dry ingredients together before you add liquid to prevent clumps.
Caring notes:
Rinse right after you use. Dry the whisk to keep it from rusting. Most metal and silicone whisks can go in the dishwasher, but check the label first.
Next steps:
Choose a whisk you feel comfortable with and test it today. Use it daily to see faster results.
2. Whisk
Editor’s Choice

Martha Stewart Richburn 1pc 12″ Stainless Steel Balloon Whisk – Satin Fi…

Chef Craft Premium Silicone Wire Cooking Whisk, 10.5 inch, Black

Whisks for Cooking, 3 Pack Stainless Steel Whisk for Blending, Whisking,…
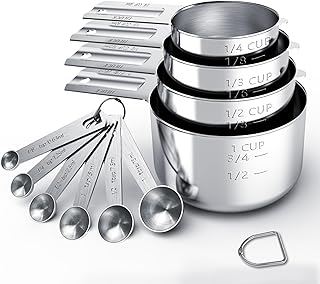
3. Measuring Cups

Measuring cups solve a common kitchen problem: wrong amounts wreck recipes. A solid set keeps you precise and speeds up cooking. With the right cups, you see the numbers fast and stay on track.
- Material: Stainless steel lasts long. Plastic is light and cheap. Glass shows measurements clearly. Stainless steel resists stains. It won’t warp if you stir hot foods.
-
Design: Nested cups save space. They stack neatly in a drawer. They tuck away on a rack or in a slim organizer.
-
Markings: Look for bold numbers and clear lines. Some sets show both cups and milliliters. Etched marks last longer.
-
Dry vs liquid: Many sets include both dry and liquid cups. Some packs mix two types in one shell. This makes grabbing the right cup fast.
-
Maintenance: Check if they are dishwasher safe. Hand washing helps keep marks readable. Dry them after use to prevent rust or fading.
-
Usage tips: Use dry cups for flour and sugar. Use liquid cups for water, milk, and oil. Measure at eye level for accuracy.
-
Storage and style: Keep them where you reach them. A bright set can add a touch of color to your counter. Store nested to save space.
-
Accuracy test: Check accuracy by measuring water at eye level. If you see drift, replace the set. Do a quick test with another liquid to confirm.
Measuring cups are the secret ingredient to recipe success! With precision on your side, you’ll whip up culinary masterpieces in no time. Don’t let wrong amounts ruin your cooking adventures!
3. Measuring Cups
Editor’s Choice
TILUCK Stainless Steel Measuring Cups & Spoons Set, Cups and Spoons,Kitc…

Pyrex Essentials (2-Pack) Glass Measuring Cups Set, (1 & 2 Cup) Measurin…

FARBERWARE 5-Piece Measuring Cup Set with Coffee Scoop, Durable Plastic …
4. Tongs
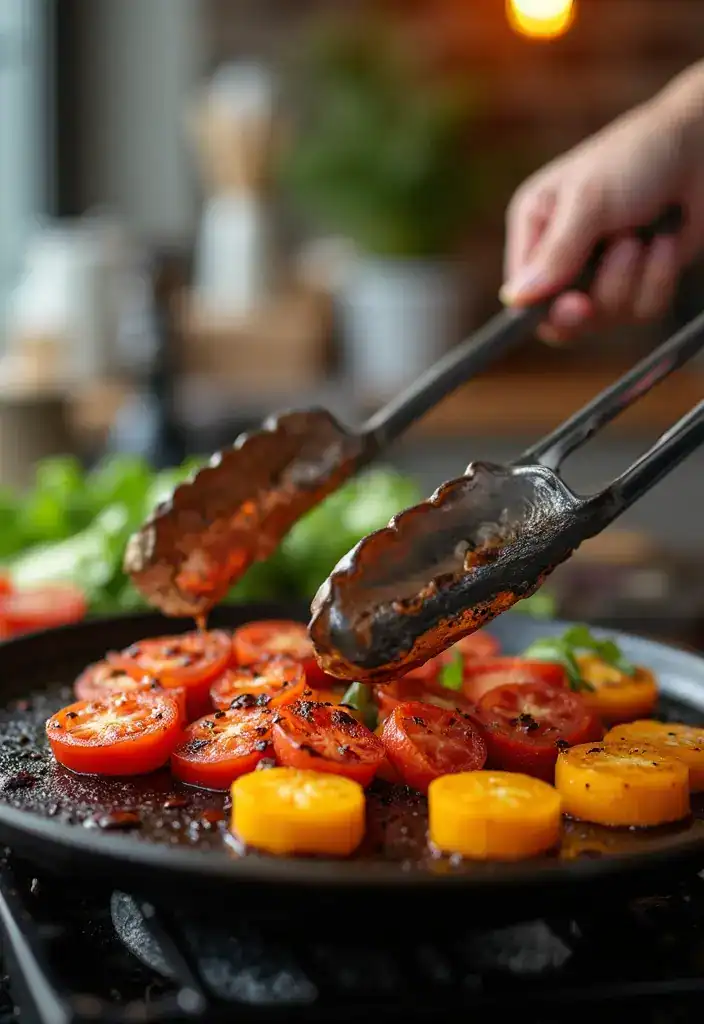
You want a tool that makes cooking easier.
Get a pair of kitchen tongs.
They flip, lift, and scoop with one hand.
They shine on the grill, stove, and at the table.
Why you need tongs
- Heat resistance helps you flip on the grill without worry, even when the pan sizzles.
-
A locking mechanism keeps them compact in the drawer and ready for fast storage.
-
Silicone tips protect non-stick pans and keep greens intact, so you can toss a salad without bruising leaves.
Choosing the right size
- Longer tongs stay cool when you reach over flames and reach into larger pans.
-
Shorter tongs give steady control for serving without bulk in your hand.
-
A sturdy hinge and a comfy grip matter most for quick, repeated use.
Quick how-to’s
- Grill veggies, flip burgers, and move fish with care to keep foods intact.
-
Toss salads softly to avoid bruising leaves and to mix in dressings neatly.
-
Lift pasta from water and drain a little so you can serve without steam burns.
Care and storage
- Clean after use and dry well.
-
Use the lock to store them without snagging other tools.
-
Inspect tips for wear and replace when needed.
With proper care, they last for years.
Next steps: grab a pair and test them in your kitchen.
A good pair of kitchen tongs is like having an extra pair of hands – they flip, lift, and serve with ease, making cooking a breeze!
4. Tongs
Editor’s Choice

Kitchen Tongs with Silicone Tips, Tongs for Cooking Heat Resistant 600 D…

Tongs For Cooking – Heat Resistant 600 Degrees Stainless Steel Kitchen T…

Grill Tongs, 17 Inch Extra Long BBQ Tongs, Premium Stainless Steel Metal…
5. Cutting Board

Here is why you need a solid cutting board. It makes prep faster and protects your knives. It also helps keep your counters clean. Let’s break down how to pick a good one.
- Material: Wood boards look nice and stay gentle on blades. Plastic boards are easy to clean and can be sanitized.
-
Size: A large board gives space for big jobs. A small board is handy for quick tasks.
-
Non-slip: Rubber feet or a textured bottom stop slips while you cut.
-
Maintenance: Wood needs a light oil finish now and then. Use food-safe mineral oil and avoid soaking. Plastic boards can usually go in hot water or the dishwasher if labeled.
Next steps: Use color coding to avoid cross contamination. For meat, use one board; for vegetables, another. Clean with hot soapy water, then dry completely. Store flat in a dry spot.
Try it this week and see how your prep flows. If you cook meat often, keep a separate board for it. Then store flat in a dry spot where you can reach it easily.
Final note: Pick a board that fits your kitchen style—warm wood for rustic vibes or smooth plastic for a modern look. A good board makes prep safer and quicker.
A solid cutting board isn’t just a surface—it’s your kitchen’s best friend! It speeds up prep time, keeps your knives sharp, and your counters clean. Choose wisely and elevate your cooking game!
5. Cutting Board
Editor’s Choice

Bamboo Cutting Board for Kitchen, Wood Cutting Board 3 Piece Set with No…

Plastic Cutting Boards for Kitchen, 3-Piece Large Cutting Board Set Dish…

Walnut Wood Cutting Boards for Kitchen, Large Chopping Board Double Side…
6. Grater

You want faster meals with better flavor. A grater helps you finish dishes in minutes. It adds texture and brightness to many recipes.
- Versatility: shred cheese, grate vegetables, zest citrus, and shave chocolate.
-
Texture options: box graters have sides for coarse, medium, and fine grates. A microplane gives fine zest. Some models add a julienne blade for thin matchsticks.
-
Easy care: rinse after use; many graters are dishwasher safe. Dry well to stop rust.
Here is how to choose the right one:
- Grip and build: sturdy handle, non-slip base. Stainless steel blades stay sharp longer.
-
Size and style: compact saves space; larger graters help on busy days.
How to use it day to day:
- For pasta, grate hard cheese over the sauce.
-
For baking, zest a lemon or orange to wake the batter.
-
For toppings, shave chocolate over desserts.
-
For salads, grate carrot or cucumber for extra texture.
-
For potatoes, shred into hash browns or crispy toppings.
Safety and care tips:
- Keep fingers away from the blade by curling them.
-
Use a guard with slippery items.
-
Rinse immediately after use to prevent dried bits.
Next steps: pick a grater that fits your kitchen and start grating.
With the right grater, you can finish many meals with less effort.
6. Grater
Editor’s Choice

Urbanstrive Cheese Grater With Container Box Grater Stainless Steel Grat…

Premium Classic Series Zester 18/8, Black – Lemon Zester & Cheese Grater…

Deiss PRO Citrus Lemon Zester & Cheese Grater — Parmesan Cheese, Lemon, …
7. Peeler

Here is why you need a peeler that fits your hand. A good peeler speeds up prep and keeps your wrists from getting tired. You’ll peel apples, carrots, potatoes, and cucumbers in minutes. The secret lies in grip, blade, and design.
- Comfortable grip: Pick a handle that sits well in your palm. A soft or textured grip stops slips during long tasks.
-
Blade quality: A sharp, sturdy blade slices skin cleanly. A dull blade fights you and slows you down.
-
Design: A swivel or Y-shaped peeler follows the curves of fruit and veg. It feels smooth and makes peeling easier.
Next steps: try a few styles to see what fits your routine. For most foods, a swivel peeler works well. A straight or Y-peeler can handle thick skins too.
Practical tips you can use today:
- Wash and dry produce first so the skin won’t slip.
-
Use light pressure; let the blade do the work.
-
Keep the blade sharp with a quick hone if you have one.
Using a good peeler changes how you cook. It helps you make salads, quick sauces, or snacks fast. Pick a peeler that feels right, and it will become a go-to tool in your kitchen.
7. Peeler
Editor’s Choice


Vegetable peelers for Kitchen, Y shaped peeler for Vegetables, Fruits, P…

Set of 2 Stainless Steel Vegetable Peeler,Y-Shaped and I-Shaped Stainles…
8. Ladle

Tired of soup splashes and sauce drips every time you serve? A good ladle can fix that. It helps you portion hot foods quickly and cleanly. It also looks neat in your kitchen rack.
What to look for in a ladle
- Material: A stainless steel ladle feels sturdy and cleans up fast. A silicone ladle protects pots and pours smoothly without scratching nonstick surfaces. Pick what fits how you cook.
-
Length: A long handle reaches deep pots and keeps your hands safe. A shorter handle works well for shallow pans on the counter.
-
Capacity: Choose a size that matches your pot. A large ladle is handy for soups and stews. A smaller one works great for gravies and sauces.
Using your ladle today
- Dip the ladle into the pot and lift with a steady tilt. Pour slowly to control the flow.
-
Pour away from you to cut down on splashes.
-
Rest the ladle on the rim for a quick drain before serving.
-
Wipe the edge after pouring to stop streaks on bowls and plates.
Care and storage tips
- Rinse after use and wash with your other utensils.
-
Dry well to prevent rust on metal parts.
-
Store in a holder or rack where the edge stays clean and ready for next use.
Quick pick for your next shopping trip
If you cook soups most days, go with a larger ladle. If you often sauce gravies, grab a smaller, heat‑resistant option. Next steps.
8. Ladle
Editor’s Choice


Chef Craft Premium Silicone Cooking Ladle, 11.25 inch, Black

1-Piece Ladle Heavy Duty Thick Stainless Steel – 8 Ounce (3.9″ Bowl Diam…
9. Kitchen Shears
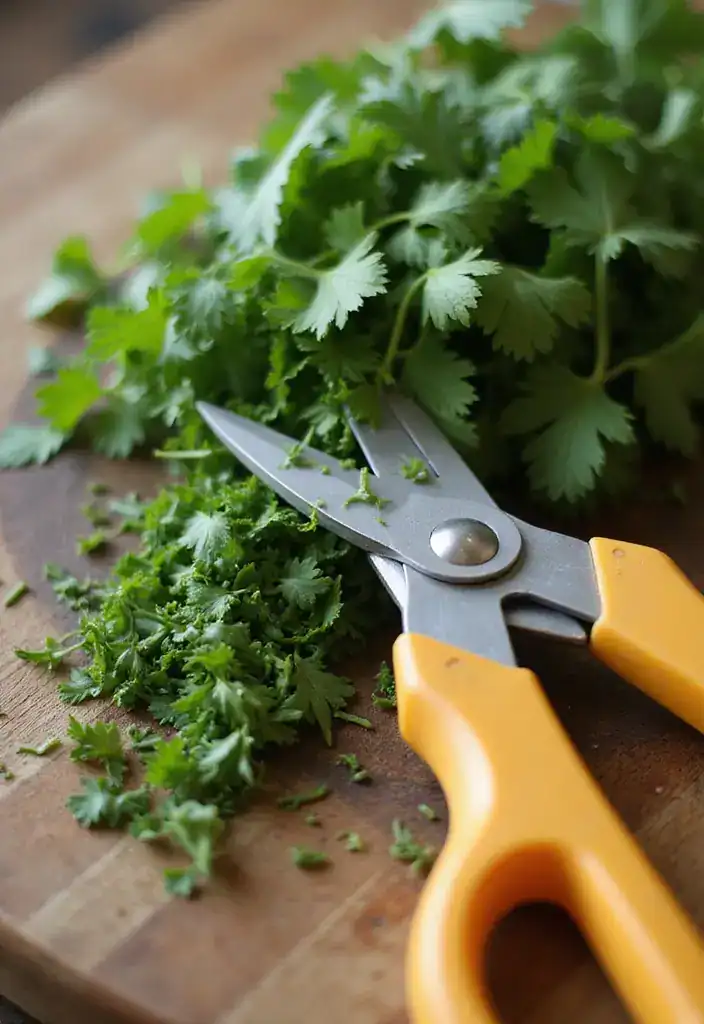
If you want a fast, clean way to prep, kitchen shears are your friend. They cut herbs, trim fat, and slice through poultry with ease. They save trips to the knife block and make small jobs quick.
Here is why these tools matter:
- Comfortable grip: The handle should feel natural in your hand and resist slipping.
-
Blade quality: Look for sharp, stainless steel blades that resist rust and stay sharp.
-
Blade style: Straight blades work well for most jobs. Curved blades help when you work around bones and joints.
-
Dishwasher safe: Easy cleanup, but dry blades after washing to avoid rust.
They are also handy for opening packages, trimming string, snipping threads, and peeling citrus zest or delicate herbs.
Keep a pair in your drawer, in a sheath, or on a magnetic strip. You will reach for small jobs.
Real-world tasks you can tackle today:
- Poultry prep: trim skin and fat.
-
Herbs and zest: snip parsley, zest a lemon.
-
Open and slice: open bags, slice bacon.
-
Garnish with ease: trim rind, add herbs.
Care and storage are simple. Rinse after use and wipe dry. Store away from kids. Sharpen blades occasionally.
Tip: keep blades clean and dry to extend their life. A quick wipe after use goes a long way.
9. Kitchen Shears
Editor’s Choice

KitchenAid All Purpose Kitchen Shears with Protective Sheath Durable Sta…
10. Food Thermometer
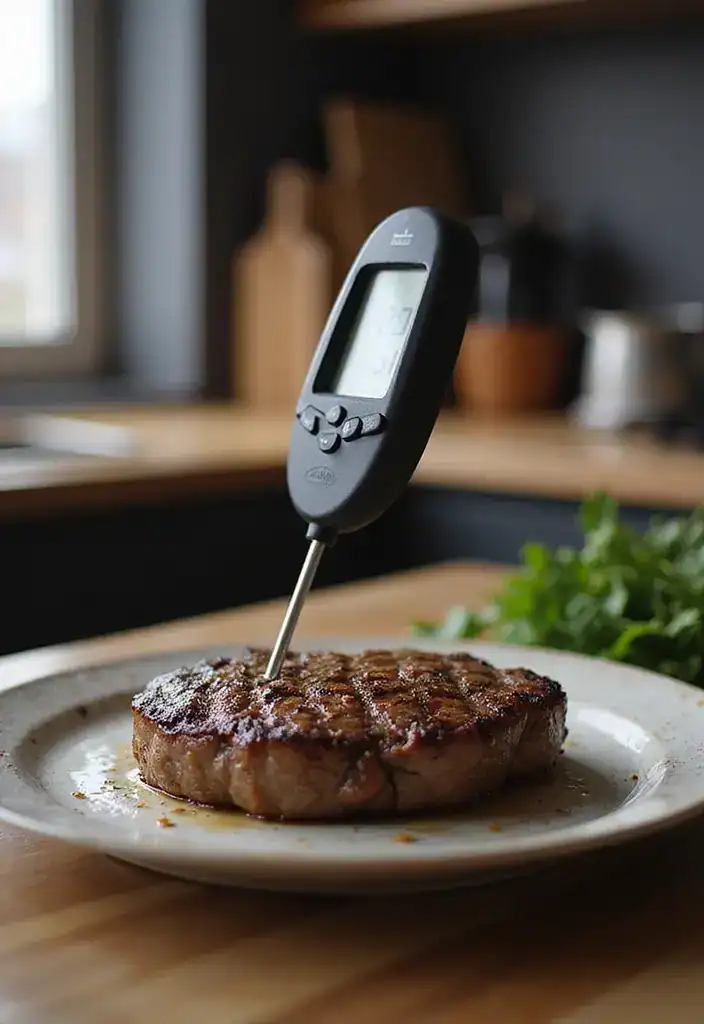
If you want your meals to turn out perfect, a food thermometer is the tool you need. It takes the guesswork out of heat and time, so you don’t worry about underdone or burnt food.
Here is what to look for when you shop a food thermometer:
- Digital vs. Analog: Digital models read quickly and precisely. Analog ones stay simple and sturdy but slow to read.
-
Range: Choose a thermometer that covers a wide temperature span. You’ll use it for grilling, baking, and even candy making.
-
Fast reading: A good thermometer shows a stable number in just a few seconds.
-
Probe quality: A long, stainless steel probe that is heat resistant and easy to clean lasts longer.
-
Ease of use: Look for a clear display, simple controls, and dishwasher-safe parts.
-
Calibration: Some models let you test accuracy with ice water and adjust if needed.
How to use it in a few simple steps:
- Insert the probe into the thickest part of the food, away from bone and fat. Next, read the temperature quickly.
-
Check the reading and compare it to the safe temps for that food. This helps ensure food safety.
-
Clean the probe before and after use to keep it accurate and safe.
-
Keep it handy for meat, bread, and even when baking desserts that need precise heat.
Why this tool pays off:
- You get consistent results every time, year-round.
-
It protects you from undercooked meat and overcooked edges.
-
It makes baking and grilling more confident, not guesswork.
Next steps: choose a model that fits your cooking style, keep it near the stove, and calibrate it once in a while to stay exact.
10. Food Thermometer
Editor’s Choice

Alpha Grillers Meat Thermometer Digital – Instant Read Food Thermometer …
Alpha Grillers Meat Thermometer Digital – Instant Read Food Thermometer …

Smart Bluetooth Wireless Meat Thermometer, 10X Enhanced Sub-1G Signal an…
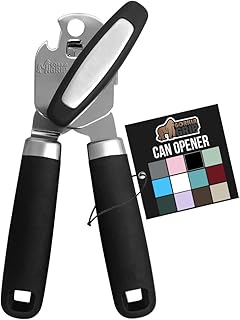
11. Can Opener
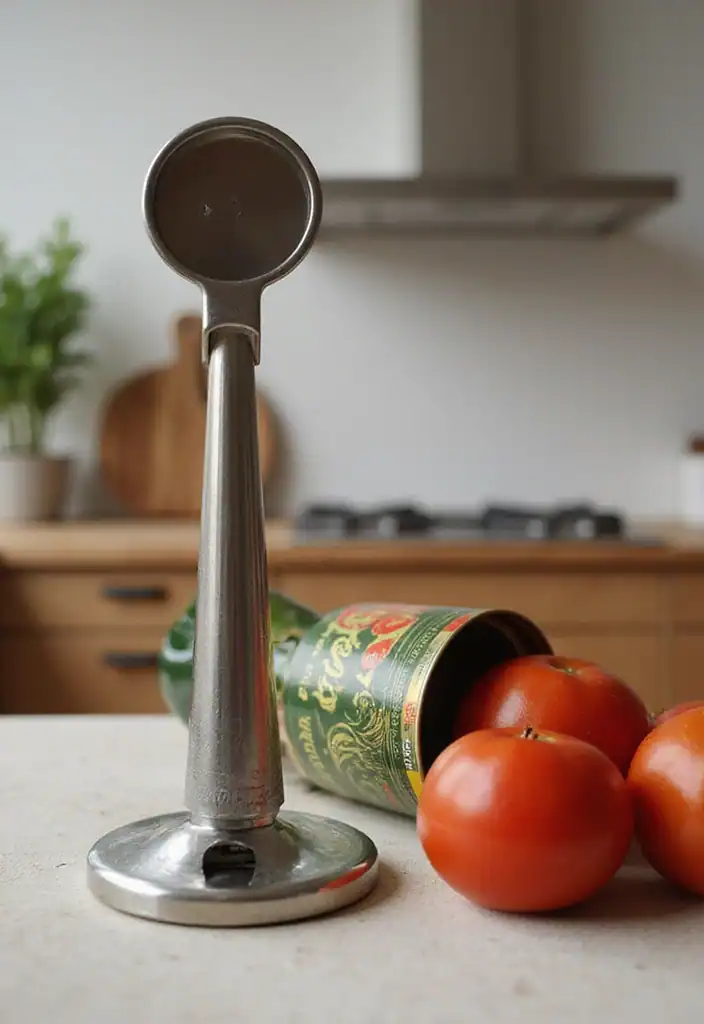
You reach for a can and pause. A good can opener should glide through the lid. A poor one slows you down. This tool makes meal prep smoother.
- Ease of use: Pick an opener with a comfortable grip and a smooth wheel. If your grip is weak, that matters.
-
Durability: Look for stainless steel parts. They resist rust and stay sharp longer.
-
Safety features: Choose a model that leaves smooth edges and has a safety stop. Some openers lift the lid a little so you don’t cut your fingers.
Next, how to choose and use it.
Here is why these details matter: you want a tool you can trust every time you cook. A manual opener works well for most kitchens and costs less. An electric model can save effort if you open many cans in a row.
Tips to keep it working well:
- Test it on a full can. Turn the handle slowly to feel any snag.
-
Clean after use. Rinse, dry, and store away from moisture.
-
Keep it handy. A spot near the stove or in the utensil drawer speeds up meals.
If you follow these steps, you’ll reach for your can opener and notice the difference in your prep time and safety.
11. Can Opener
Editor’s Choice
GORILLA GRIP Heavy Duty Stainless Steel Smooth Edge Manual Can Opener an…

Cuisinart CCO-50BKN Deluxe Electric Can Opener, Black

Lock N‘ Lift Can Opener with Lid Lifter Magnet – Manual Opener with Lock…
12. Colander

You want a colander that makes draining and rinsing fast and clear. Without one, pasta clumps or veggies sit in water. A good colander changes that with less mess and less fuss.
Choosing a colander
- Material: Stainless steel lasts, shines, and cleans easy. Plastic is light and cheap, but it can stain.
-
Size: A large colander handles big batches. A small one fits quick, single meals.
-
Stability: Look for wide feet or a flat base so it won’t tip when you pour.
-
Design: Sturdy handles help you lift hot bowls. A hanging loop helps you store it where you can grab it.
-
Style: Colanders come in colors and textures. Pick one that matches your kitchen vibe.
How to use it
- Rinse produce in the colander under cool water. The spray wakes up dirt and grime.
-
Drain pasta over the sink. Shake a little to push out more water.
-
Give it a quick tilt and a pause. Water drips away, and the colander dries faster.
-
After use, let it air dry. A dry colander stays clean and rust-free.
Care tips
- Rinse, dry, and store in a dry spot. Don’t keep water trapped inside.
-
If you have a metal colander, dry it soon after washing to stop rust.
Next steps: pick a colander with stable feet and easy-to-hold handles. Keep it close to the sink for quick meals.
12. Colander
Editor’s Choice

ExcelSteel Colander Set Stainless Steel | Nesting Design | Mirror Polish…

3 Pack 18/8 Stainless Steel Colander Sieves(5-Quart, 4-Quart and 3-Quart…

Collapsible Colanders (3 Pack Set) Food Strainers with Over-Sink Water D…
13. Mixing Bowls

If you want smoother prep, you need the right mixing bowls. They help with batter, salads, and marinades. They also keep your kitchen tidy.
Key choices for mixing bowls:
- Glass options: Glass bowls let you see the mix as you work.
-
Stainless steel: Stainless steel is durable and light.
-
Ceramic or porcelain: They look nice for serving, but they can be heavy and chip.
-
Size range: Small bowls work for whisking eggs. Medium bowls handle dry mixes. Large bowls hold dough or big salads.
-
Nesting design: Choose bowls that stack inside each other to save space.
-
Non-slip bases: A grip on the bottom keeps the bowl steady while you mix.
-
Lids for storage: Lids help marinate and store leftovers without extra containers.
-
Care and durability: Stainless steel washes quickly. Glass bowls often go in the dishwasher. Check care instructions.
-
Style and value: Pick colors or finishes you like that still stay practical for daily use.
Here are practical uses to get you going:
- For beating eggs, use a small bowl.
-
For dry mixes, a medium bowl is ideal.
-
For dough or large salads, grab a big bowl.
-
For marinating, glass or ceramic bowls work well.
Next steps:
- Choose a trio that nests and covers common tasks.
-
Check rims and bases for sturdiness.
-
Keep them within reach and use them often.
13. Mixing Bowls
Editor’s Choice

Priority Chef Stainless Steel Mixing Bowls with Lids Set, 3 Grater Attac…

WHYSKO Meal Prep Stainless Steel Mixing Bowl (5-Piece Set) Home, Refrige…

KooK Ceramic Mixing Bowls, Nesting Set of 4, Embossed Kitchen Dishware, …
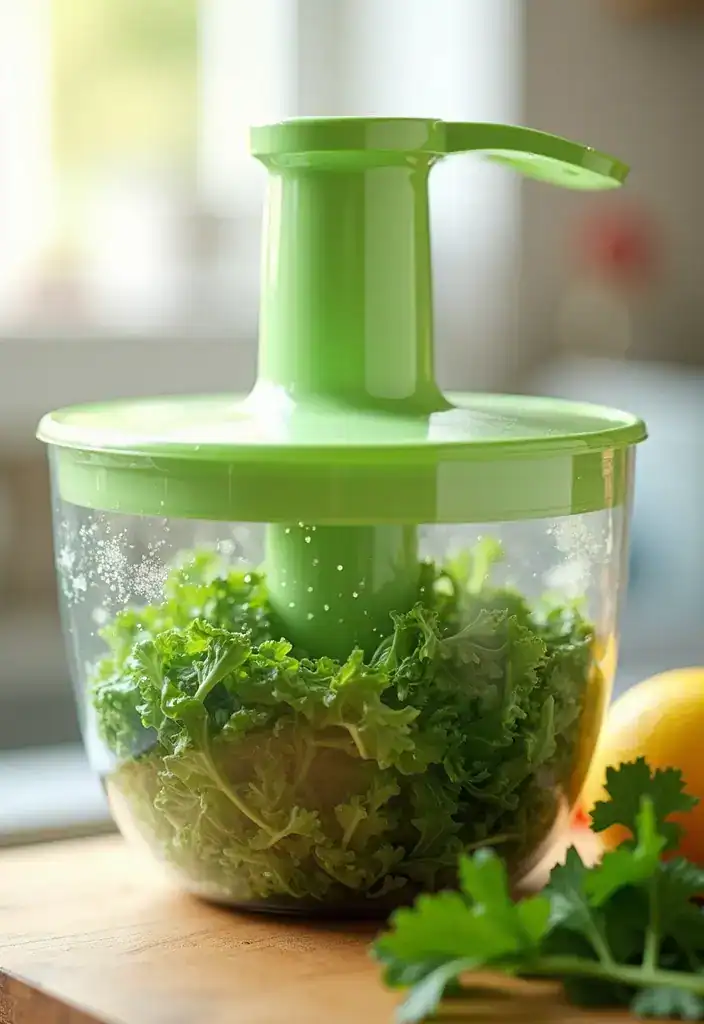
14. Sifter

Are lumps slowing you down? A sifter fixes that. It makes flour and other dry ingredients light, so batters rise nicely.
- What a sifter does: A fine mesh catches tiny lumps in flour, cocoa, and powdered sugar. It aerates the mix, helping blends stay smooth.
-
Easy to use: Pick a sifter with a crank or squeeze handle. A twist sends powder through in seconds. No big mess.
-
Multi-use: Sift cocoa for dusting cupcakes, powdered sugar for cookies, or spices such as cinnamon. Materials matter: stainless steel lasts longer and resists rust; aluminum models are lighter but may wear with heavy use.
Here’s why you need one: It gives your baked goods a delicate texture and even crumb. If you bake often, it’s handy. It also helps you dust toppings evenly.
How to pick one: Look for a fine mesh and a comfortable handle. Built-in bowls or collapsible models save space and store easily.
Tips for using: Sift dry ingredients over your bowl before you add wet. Gently tap the side to release clumps. Dry after use to prevent rust.
Care and storage: Rinse quickly, dry completely, and store in a dry place. A sifter makes cookies and cakes look polished.
14. Sifter
Editor’s Choice

Flour Sifter, 3 Cup Flour Sifter for Baking Fine Mesh Rotary Hand Crank …
Flour Sifter, 3 Cup Flour Sifter for Baking Fine Mesh Rotary Hand Crank …

Upgarded 2PCS Soil Sifter for Gardening, Rock Sifter for 5gallon Bucket,…
15. Potato Masher

Your mashed potatoes should be smooth and glow with cream. A good potato masher helps you reach that texture fast. You’ll notice the difference in every bite.
Here is why this tool matters:
- Material Stainless steel with a sturdy handle lasts longer than plastic.
-
Design A flat, wide mashing head makes even texture easier to achieve.
-
Size and care Pick a size that fits your pot and check if it’s dishwasher safe.
Next, how to use it:
- Warm your potatoes first so they mash easily.
-
Hold the masher and press with steady, small circles.
-
If you want extra cream, stir in a knob of butter or splash of milk after mashing.
-
Scrape the sides of the pot so you don’t waste any soft mash.
Beyond potatoes, you can use it with other foods:
- Mash avocados for quick guac or spreads.
-
Use it on ripe bananas for smooth baby food or desserts.
-
Mash beans or chickpeas for quick dips.
Common tips and limits:
- Keep it simple. Don’t overwork the potatoes; they can get gluey.
-
Clean it soon after use to prevent sticking.
Next steps: add a potato masher to your kitchen kit and try it tonight.
Store it in a drawer or hang it on a hook for easy access.
15. Potato Masher
Editor’s Choice

Potato Masher, Stainless Steel Heavy Duty Metal Potato Ricer With Mirror…

Chef Craft Select Sturdy Masher, 10.25 inch, Stainless Steel/Black

KitchenAid Gourmet Stainless Steel Wire Masher, 10.24-Inch, Black
16. Microplane

If you cook a lot, you know fresh flavors matter. A Microplane zester can unlock citrus oils in seconds. It’s small, but it can lift simple dishes with bright zest or a delicate snow of cheese.
What to look for
- Sharpness: A sharp microplane cuts zest cleanly and avoids pulling the fruit’s bitter white pith.
-
Length: A longer blade speeds up zesting for large amounts, while a shorter one fits in tight drawers.
-
Material: Stainless steel lasts and cleans up fast.
Ways to use it
- Zest citrus over desserts, salads, or pasta to wake up flavors.
-
Grate hard cheese like Parmesan for a light snow on noodles.
-
Grate garlic or ginger for quick aromatics.
-
Shave nutmeg or cinnamon for drinks.
Care and storage
- Rinse it after use and dry it well to prevent rust.
-
Store with the blade protected or in a drawer where it won’t cut you.
Tips for safe use
- Hold the tool with a firm grip and guide the blade across the skin, not into it.
-
Let the blade do the work.
Limitations
- It works best on firm foods. It may not grate soft cheese well.
Next steps
- Choose a stainless microplane with a comfortable handle and try it on a lemon, a carrot, and a wedge of Parmesan. With it, you can lift the flavor of everyday meals, surprisingly fast.
16. Microplane
Editor’s Choice


17. Salad Spinner
If you want crisp salads fast, this tool helps. You rinse greens and herbs, then quickly dry them so they stay bright and crunchy.
Here is how a salad spinner helps you every week:
- Size: Pick a model that fits your typical batch. A bigger basket means you can wash and spin more at once.
-
Ease of use: A smooth crank or pull handle makes spinning quick and simple.
-
Material: Go for BPA-free plastic or stainless steel for safety and durability.
Using it is easy: wash greens, shake off excess water, then spin for 20 to 60 seconds. The water wrings away and the leaves come out dry. You can pop them into storage or start dressing right away. It also works well for drying herbs after a quick rinse.
Some downsides to note: it takes counter space, and tiny batches may feel fiddly. Still, you gain drier greens, fewer soggy ends, and faster prep.
Next steps: choose a size that fits your meals and try a 30-second spin on your next batch. You’ll see the difference in taste and texture.
17. Salad Spinner
Editor’s Choice

OXO Good Grips Little Salad & Herb Salad Spinner, Fruit Washer and Lettu…
OXO Good Grips Little Salad & Herb Salad Spinner, Fruit Washer and Lettu…

Large Spin Stop Salad Spinner- Wash, Spin & Dry Salad Greens, Fruits & V…
18. Potato Ricer

If you love smooth, creamy mashed potatoes, a potato ricer can change how you cook. It makes fluffy mash with barely a lump, and it looks pro on the plate.
Why you want a potato ricer
- Perfect texture: It pushes cooked potatoes through tiny holes, breaking them down evenly so there are no chunks.
-
Versatility: You can mash cauliflower, carrots, or even make fruit purées for quick desserts or baby food.
-
Easy to clean: Many models go in the dishwasher, and the rest rinse clean in minutes.
Next, you’ll see how a potato ricer fits into your kitchen routine.
How to use your ricer
- Boil the potatoes until they’re tender.
-
Drain well and let them steam off a bit.
-
Fill the hopper and press the plunger to push the potato through the holes.
-
Stir the mash in a bowl and fluff with a fork before you season.
Here are quick tips to get the best results.
Tips for best results
- Keep potatoes warm before mashing to help them stay light.
-
Add butter or cream after ricing so the texture stays smooth and airy.
-
Season after ricing for even flavor throughout.
If you’re shopping, here’s what to look for.
Materials and care
- Choose stainless steel for durability and easy cleaning in the sink or dishwasher.
-
Look for two hole sizes. One for fine mash, one for a coarser texture.
-
Pick a model with a comfortable grip that fits your hand.
-
Most ricers are dishwasher safe, but wash the head by hand if it’s sticking with food scraps.
Getting the most from your ricer
- Store it in a dry place so it stays clean and ready.
-
Try mashing other veggies like cauliflower or carrots to expand its use in your meals.
A potato ricer is your secret weapon for smooth, creamy mashed potatoes! Elevate your dishes and impress your guests with this simple yet transformative kitchen utensil.
18. Potato Ricer
Editor’s Choice

Potato Ricer, Sopito Stainless Steel Potato Masher for Commercial and Ho…

8oz Deli Food Storage Containers with Airtight Lids – 300 Sets (6 packs …
Conclusion

Having the right kitchen utensils can significantly enhance your cooking experience, making it fun and stress-free. From mixing to measuring, each tool on this list serves a purpose that can elevate your culinary creations and make meal prep seamless.
Consider adding these essentials to your kitchen arsenal—they’re functional and stylish, ensuring you can whip up your favorite dishes with ease. Happy cooking!
Note: We aim to provide accurate product links, but some may occasionally expire or become unavailable. If this happens, please search directly on Amazon for the product or a suitable alternative.
This post contains Amazon affiliate links, meaning I may earn a small commission if you purchase through my links, at no extra cost to you.


